
Rear Shock And Spring Replacement
Henry Fok, photos by Larry Karpman
This task is not very hard. You can easily do this in your driveway
in under two hours per side. You do not have to remove the subframe,
and there is no imminent danger in removing the springs from the car
as with the front springs. Since the procedure is much the same
between these two tasks, they are presented together.
The car in these pictures is Larry Karpman's 1987 XJ6 VdP. The
ugly galoot in the pictures is yours truly. This information applies
to the Series III only - other Series are similar, but I can't
guarantee that they'll be identical.
For this task, you will need a ratchet, a selection of SAE sockets
and wrenches, a hammer, and a spring compressor (AutoZone rents a
decent one, and that unit is pictured here.)
You may click on any picture to see a much larger version. This
FAQ is not a substitute for a workshop manual. It is intended as a
supplement, to give you some idea of what things look like and what
the manual is talking about. Therefore, not all the details will be
given.
***
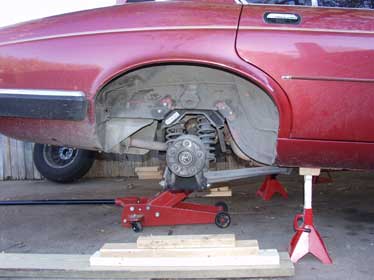
Loosen the lug nuts on the appropriate wheel. Jack the car up and
support it properly. Instructions on how to do this are elsewhere in
the FAQ's, so I will not reprise that information here.
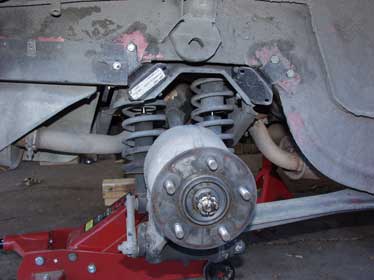
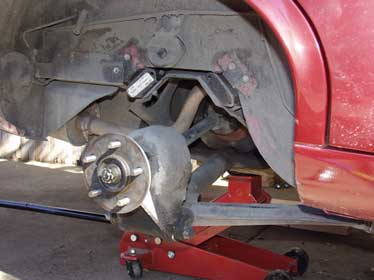
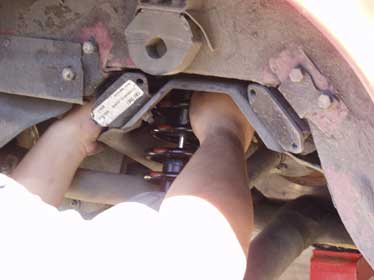
Remove the wheel. What you see should look something like the
following picture.
You see the shock/spring assemblies clearly visible. Note the
radius arm extending from the main chassis to the rear hub
assembly.
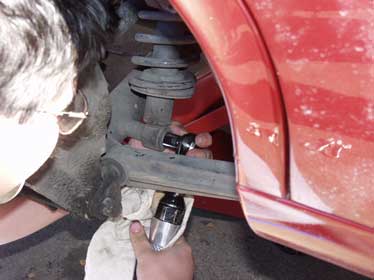
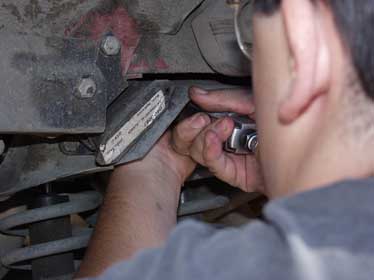
Remove the rear nut from the crossbolt. This is what the lower
eyelets of the shocks attach to. Tap the bolt out rearwards, gently.
Side in picture is INCORRECT, and was done for photo purposes.
Wrong side nut was removed to indicate which bolt! Tap out from rear
(opposite) side!
The shock assemblies are now held on by one bolt, at the top of
each shock. Remove this bolt, paying attention to how the washers go
in place. The front bolt will have a washer attached to something by
a spring. Be careful of this, and remember where this goes.
Upon removal of this bolt, washers and nut, the shock and spring
assemblies will no longer be attached from the car. Remove them.
Don't worry about mixing them up - they're identical. If you are (for
some reason) replacing the shocks without replacing the springs or
vice versa, attach the spring compressor to tan assembly and follow
the directions on how to secure it to the spring. If you are
replacing both with OEM units, toss the old assemblies into your
scrap bin - you do not need to strip the hardware from the old units.
Attach the spring compressor to the new spring per the directions.
Compress the spring.
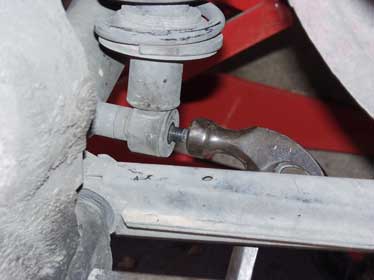
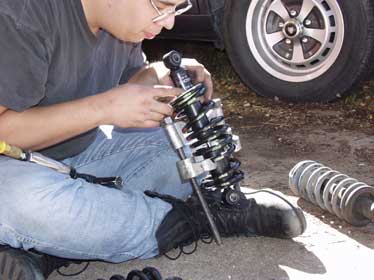
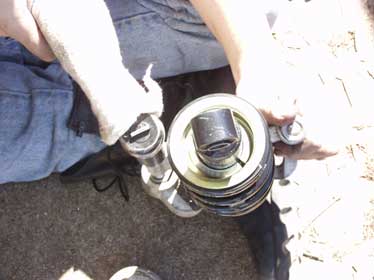
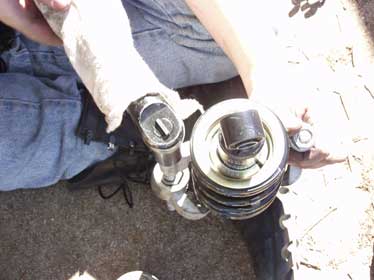
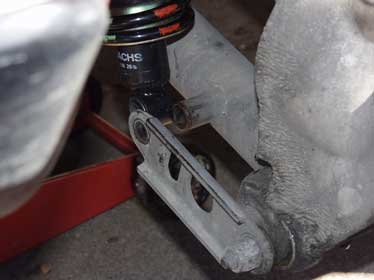
Below is a picture of the top of the shock and spring assembly.
Note that the spring plate is held to the shock body by these two
collets. If you are separating the old assembly, you will have to
compress the spring to the point where the place is below these
collets and you can pry them out of their channel in the shock. Then,
you can remove the plate and spring off the shock body. If you are
replacing the entire assembly (or have completed the prior step if
replacing only one element), you will need to compress the spring to
the point where you can put the plate on, fit the collets in their
slot, and then decompress the spring, allowing the spring's pressure
to hold the collets and plate in place. Note how everything is
assembled here. (Towel is to stop freshly oiled air tool from
spraying oil everywhere.)
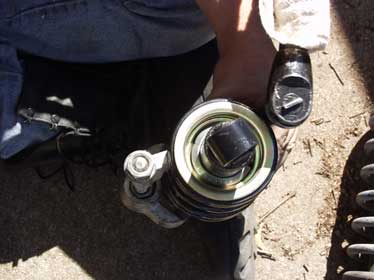
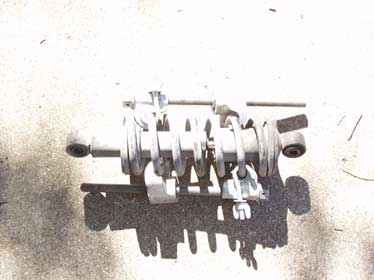
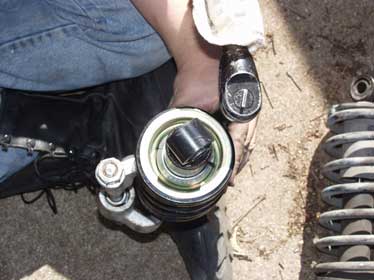
This is about what it should look like when the tension is
released. The collets should be seated in their groove on the shock
fully. There will be a gap between the collet ends; arrange this as
seems most aesthetically pleasing to you.
Now is also a good time to replace your radius arm bushings - but
that's covered elsewhere. Greasing the now easily accessible grease
points is a *really* good idea at this time, too. Reinstall the
assemblies by their upper eyelets. Remember to assemble the washers
in the order that you removed them. (We broke the whip hose when
doing this shoot. It is not recommended that you use air tools
without a whip hose.)

You may have to twist the lower shock eyelets around to make them
line up correctly. Reinsert the crossbolt, tighten down the nut, and
you're about done.
The rest, as they say, is the reverse of disassembly.


