| ||||||||||||||||||||||||||||||||||||||
| ||||||||||||||||||||||||||||||||||||||
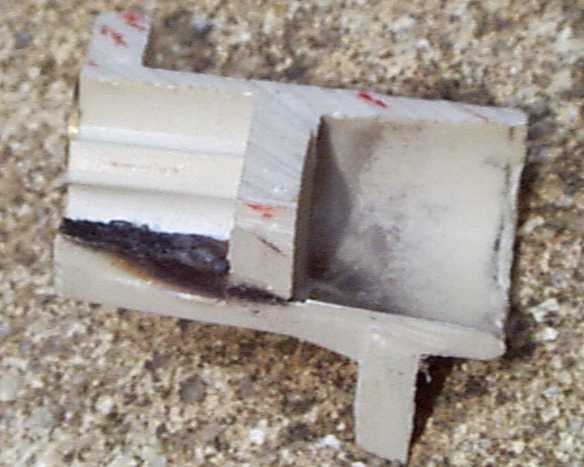
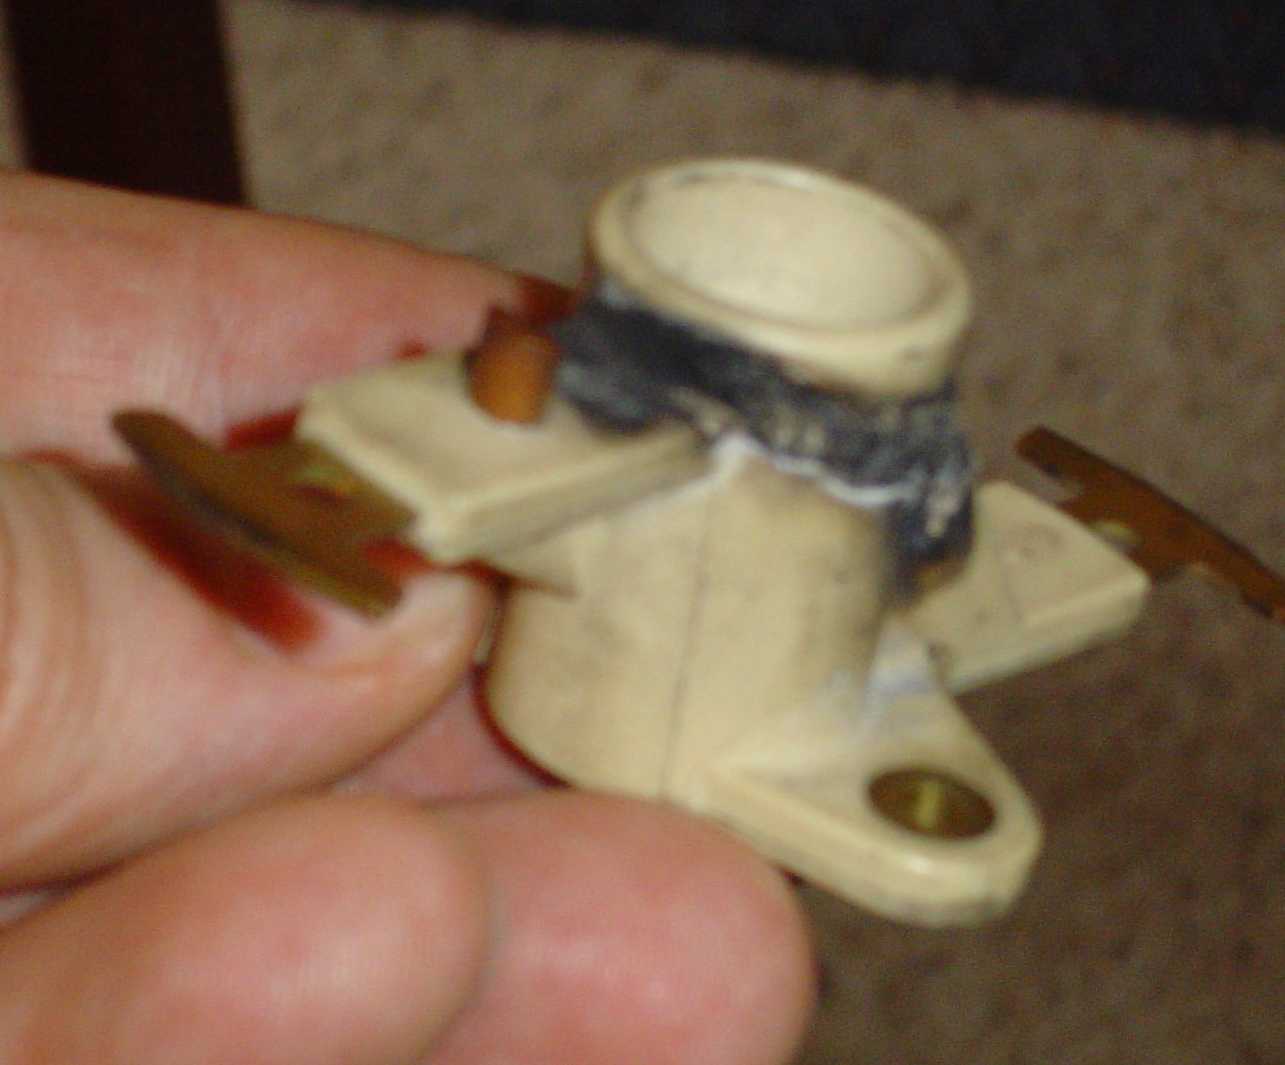
Jaguar V12Marelli Cap & Rotor PicturesThe Marelli ignition system has a history of cap and rotor problems -- especially when expensive aftermarket caps and rotors are used in place of the even more expensive genuine Marelli articles. The most notorious problem is with the rotor, where the spark pulses from the center coil connector (A bank) can break through the center of the rotor and short to ground on the end of the distributor shaft itself. Below is a photo of an aftermarket rotor that has been sawn in half and then sawn again, right through the area where the breakthrough occurred. This picture came out pretty well, considering how small the part is. Pay no attention to the red streaks, I think they're the paint from the side of my hacksaw blade. This fried rotor was sent to me by LaRue Boyce.
For orientation: The area to the right in this picture is the
top of the rotor, the opening where the carbon brush contacts the brass
terminal within the rotor. The brass has been removed here, but
it
sat against the right side of that partition in the middle of the
picture. The area to the left in this picture is the
asterisk-shaped opening in the bottom of the rotor where it fits over
the distributor shaft. The arc has jumped from the brass contact
right through the partition underneath it, then along the inner surface
of the asterisk-shaped opening to the distributor shaft, which is
grounded. This is an especially dangerous failure mode. The breakthrough results in no ignition for the entire right bank, but the EFI system thinks there is still ignition to the right bank and continues to pour fuel into it. The left bank keeps running normally, and due to each bank of a V12 being perfectly balanced independently of the other, it runs quite smoothly -- although there is obviously a precipitous lack of power. The lack of power, of course, causes the driver (or the cruise control) to add more throttle, adding even more fuel and air into the right bank. If the car is driven more than a matter of seconds in this mode, even just trying to find a good place to pull over, the unburnt fuel and air entering the already-hot right side catalytic convertor can cause an underhood fire and destroy the car. There are reports of the same breakthrough problem occurring
with the genuine Marelli rotor, although it apparently is not as
common. Breakthroughs have occurred with aftermarket rotors
within an hour of installation, while the genuine Marelli is reportedly
reliable for at least 15K miles or so. Of course, that's still
not
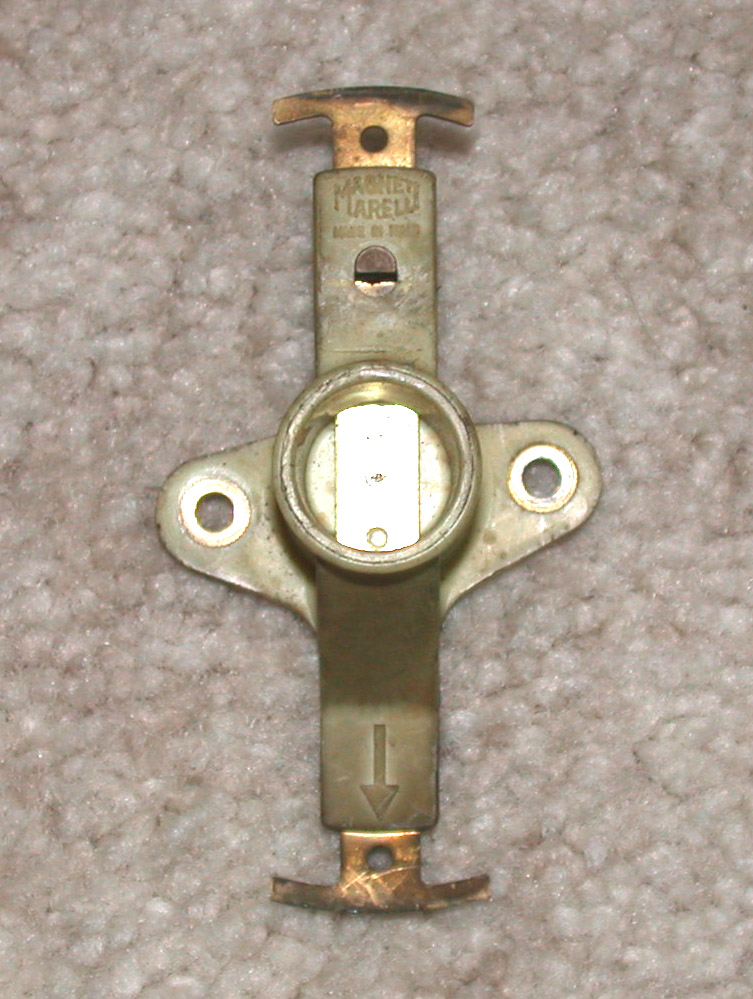
very far as caps and rotors go, especially ones this pricey. Wanna know how to tell a genuine Marelli rotor from an aftermarket? John Schmincke provided some pix of the genuine article. This is the view from above:
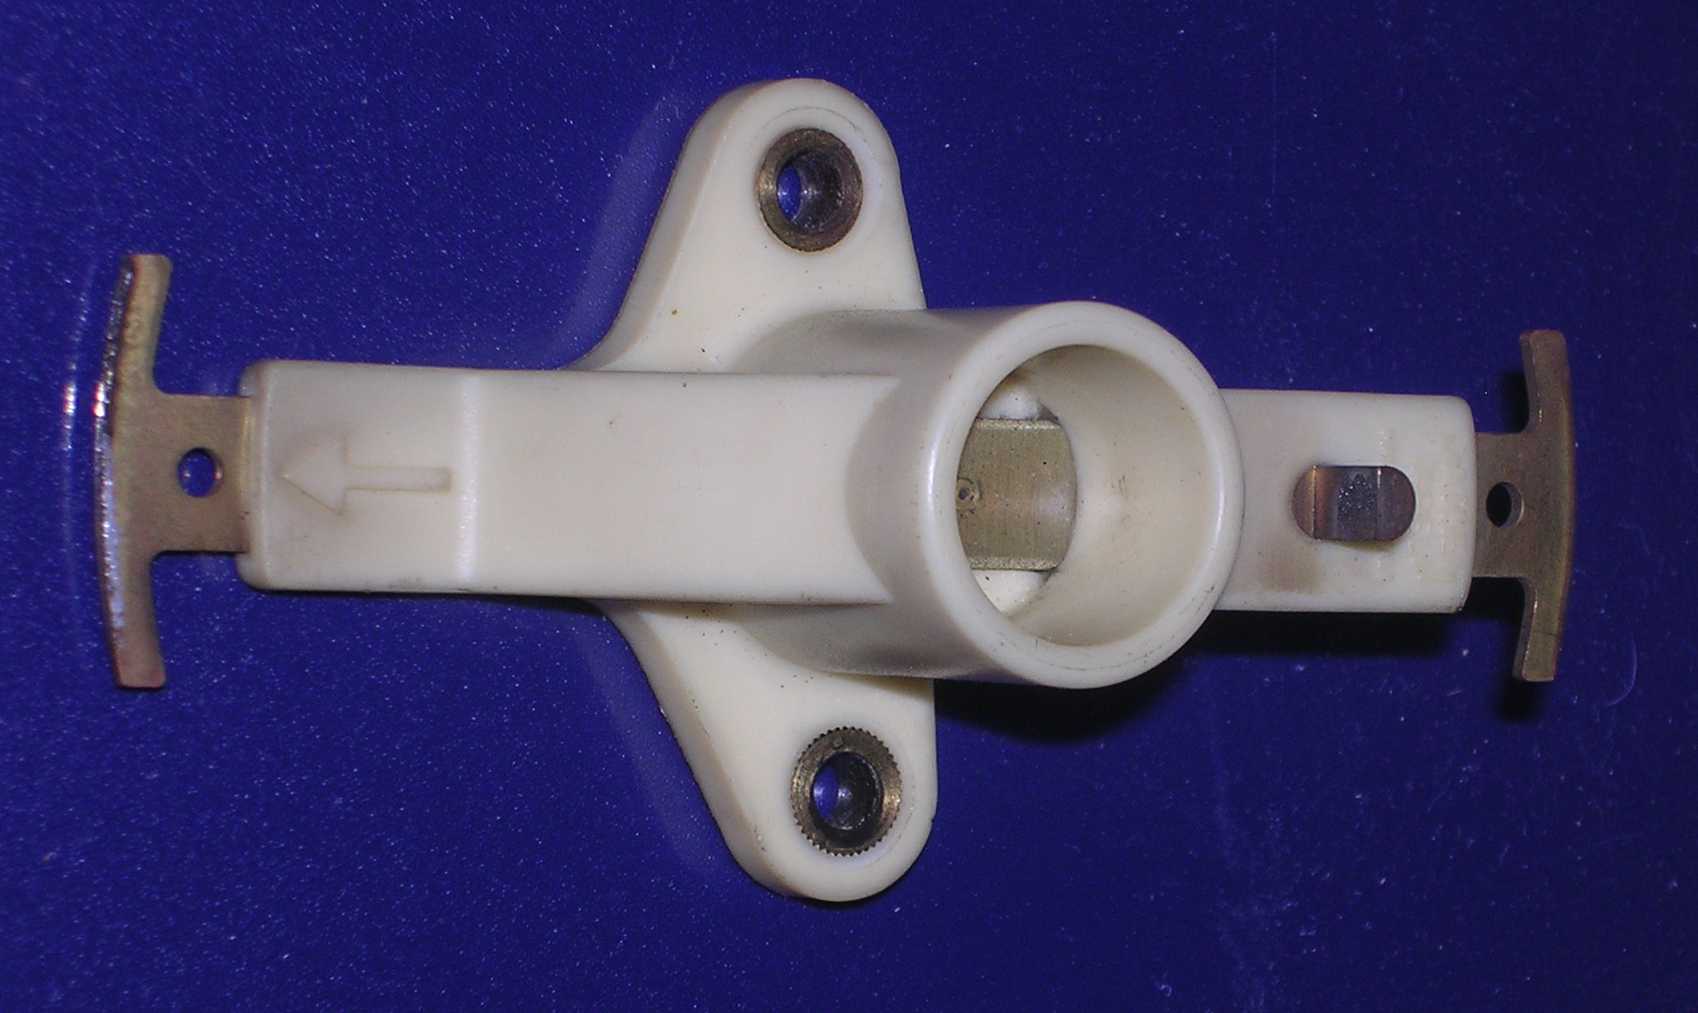
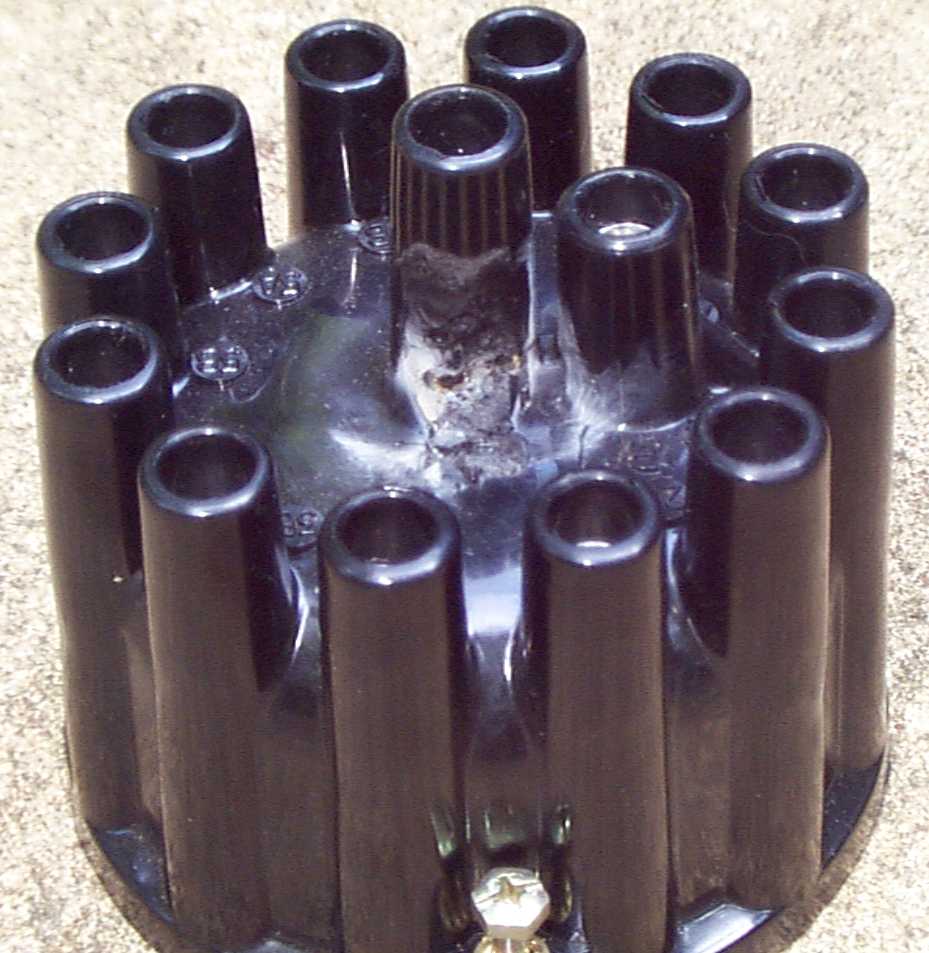
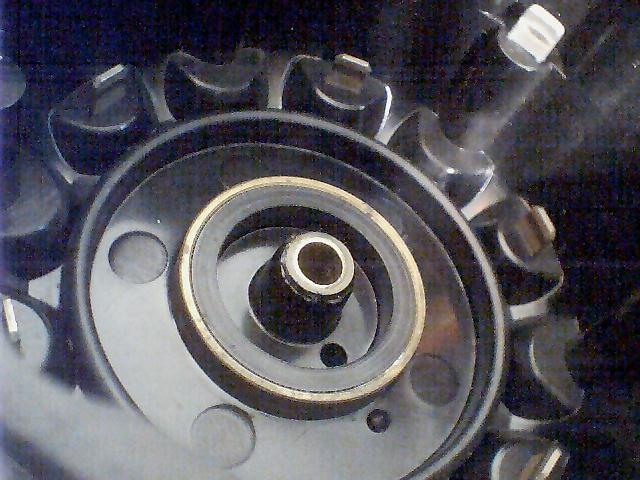
Look between the tip at the top of the picture and the post near it. See the Magneti Marelli logo? That's the only way to be sure. Don't rely on the official Jaguar box it comes in, or the lies that the seller is feeding you, or a "Made in Italy" stamp, or a particular color plastic, or the extortionate price paid, or whatever. If you want the genuine article, insist on that Magneti Marelli logo on the part itself. Schmincke also provided this pic of the bottom of his genuine Marelli rotor: 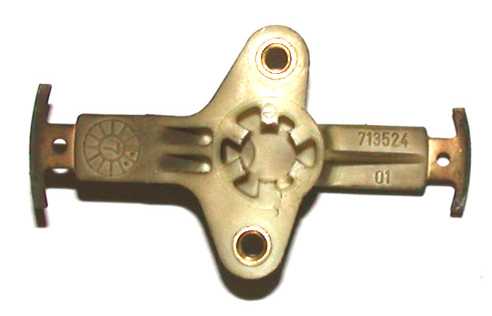 Max Rieger provided some more pictures of a (used) genuine Marelli rotor. "If anything the pictures make the rotor look less yellowed than in real life."
To improve the fix yet more, cut or grind the top of the distributor
shaft down. This will leave the silicone sealant thicker, which
makes it that much harder for the electricity to break through
it. You can actually cut the distributor shaft all the way down
to flush with the rotor mounting plate if you choose; the screws will
locate the rotor properly. Judging from the lack of reports of such failures after applying
silicone sealant, this appears to be a very effective fix. One
owner even took a rotor that had already suffered a breakthrough
failure and applied silicone and tested it in his engine, and it ran
properly. That's an excellent verification of the fix, but it's
not recommended as a normal practice; if your rotor has broken through,
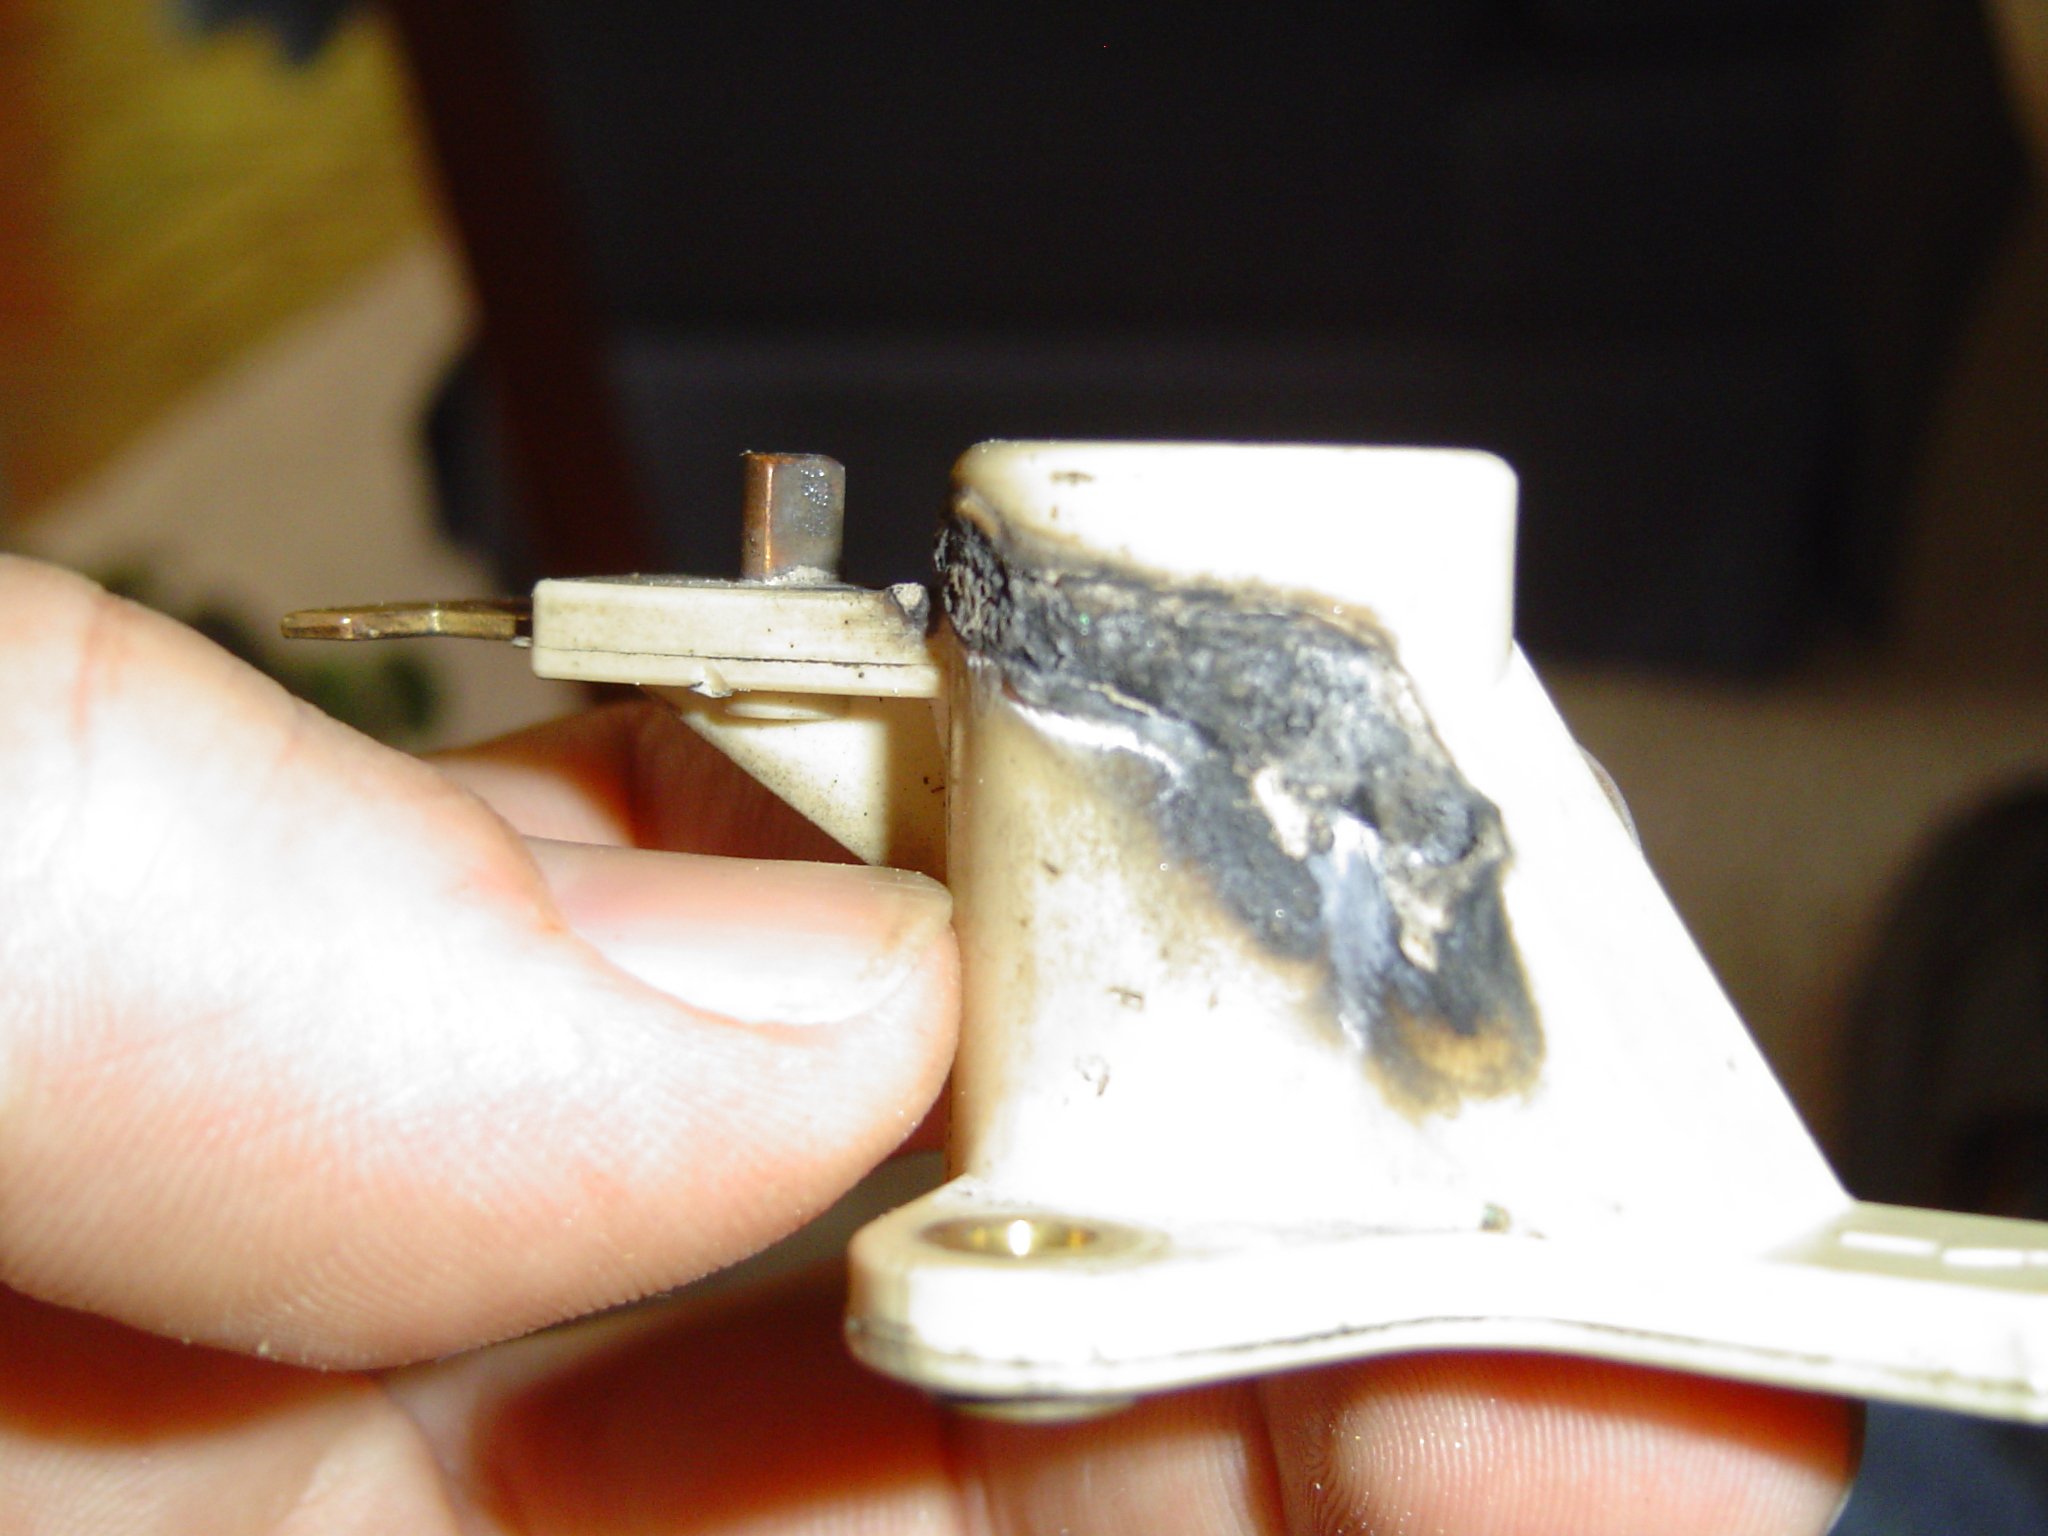
apply silicone sealant to a new rotor and install it. George Goodridge apparently had a different problem with his
aftermarket rotor. It's still burned, but on the outside rather than the
inside.
It's not readily apparent where the arc was going! The
silicone in the hole on the bottom probably wouldn't prevent this
failure. Fortunately, Goodridge is the only one to ever report
this particular phenomenon. What's more, he reports that his engine was
actually still running pretty well! He only found this problem
(and the problems with his cap shown below) while
in the area looking at other things. One common problem with the aftermarket cap is that the spring behind the carbon brush in the center post may not be installed properly to make contact with the aluminum terminal at the bottom of the hole. The spring behind the carbon brush is narrow at the brush end to grip the brush so it won't fall out while you're installing the cap. The other end of the spring is also narrow -- but the spring is fat in the middle so as to grip the inside of the hole so the spring and carbon brush don't fall out together as you're installing the cap. The result is that the spring may be installed such that it is not in physical contact with the metal at the bottom of the hole; the wide spot in the middle of the spring is holding it securely but also preventing it from being fully bottomed, so to speak. Everything looks just fine to the naked eye, but if the hole is surrounded by plastic and only has metal at the bottom, there is no electrical contact made. When operating, it appears to work OK at first since the arc will merely jump from the terminal to the spring. It'll start burning things pretty quickly, though.
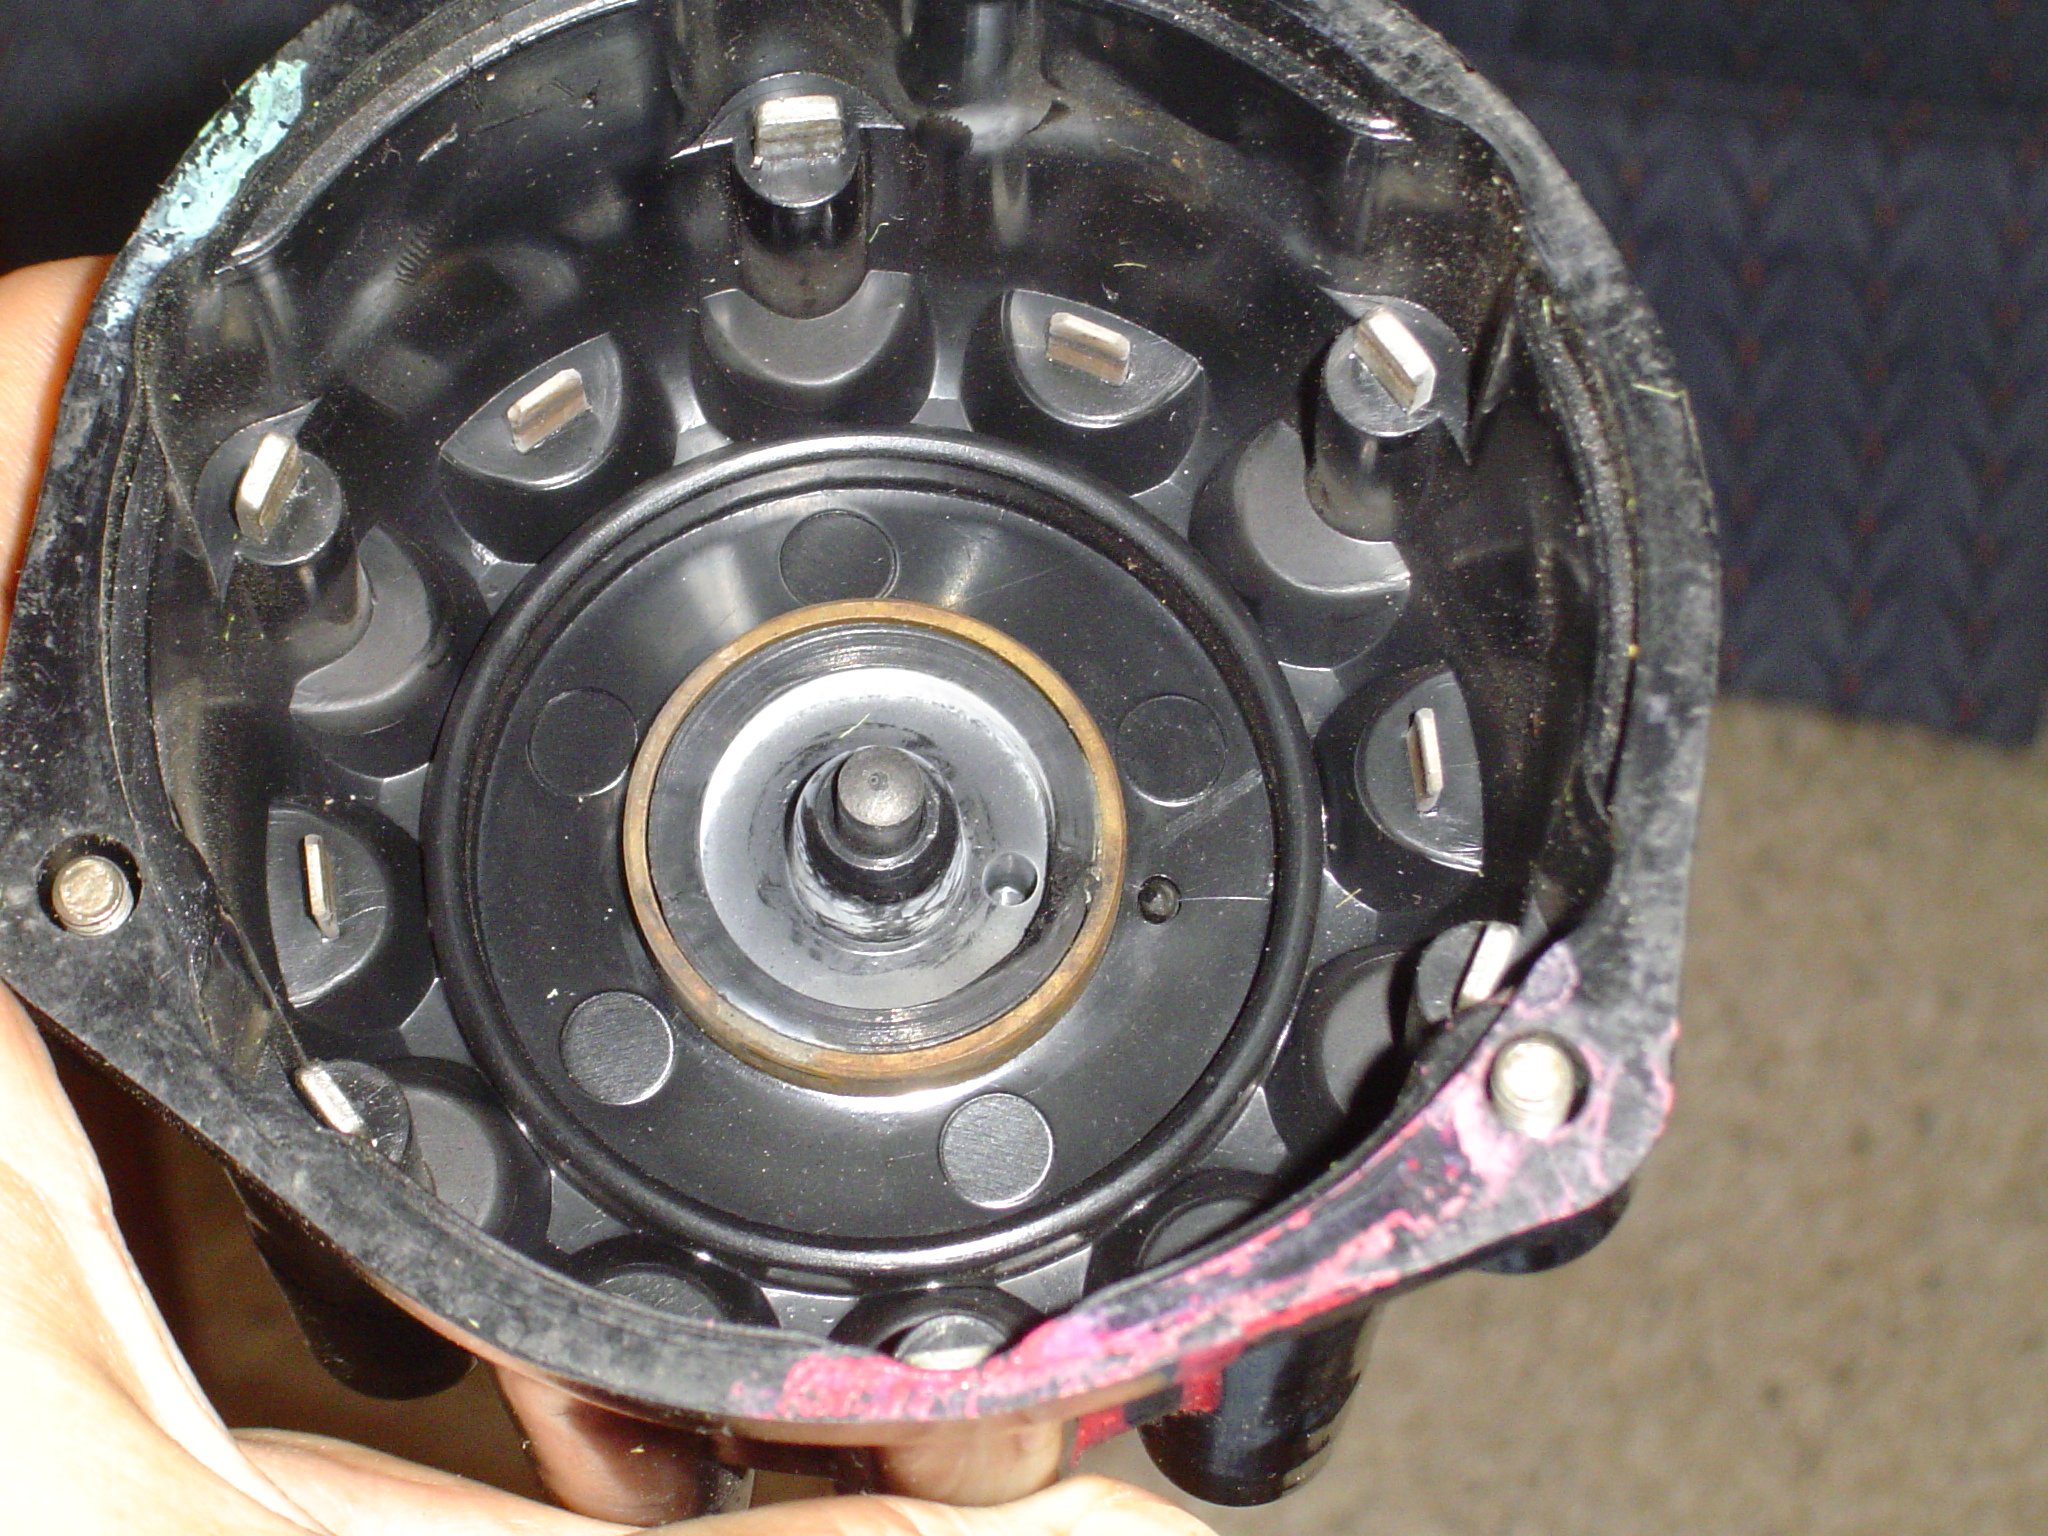
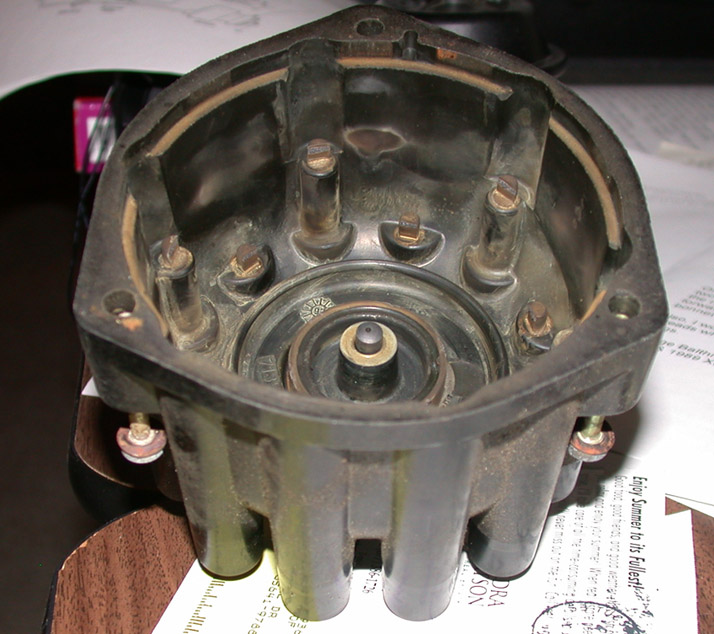
This cap was sent to me by Andrew Klopfenstein. It has been melted from the inside out along one side of the center post. It is really hard to get good digital pictures of charred areas on a black part. Here's a picture of an aftermarket cap with the carbon brush surrounded by plastic:
This pic was provided by Goodridge, along with the pics of his rotor above. The stuff that looks like white dust surrounding the center teminal? Unknown. The colored paint? "I can't explain all the colors, but I think a previous owner had some electrical problems as the same pastels are marked on the coils also." Obviously, it would be a good idea to pull the carbon brush and spring out of the cap, stretch the spring to make it a bit longer, and make sure the spring is reinstalled properly so that it contacts the metal terminal inside the cap. It's easy to check for success; use a VOM check for continuity between the spring and the terminal. If there is none, the spring isn't touching the terminal. Unfortunately, when installing that spring it's pretty difficult to get it all the way down so it makes contact, and it's pretty easy to deform it while trying. It might help to turn the spring upside-down. It also might help to twist it while trying to install it.
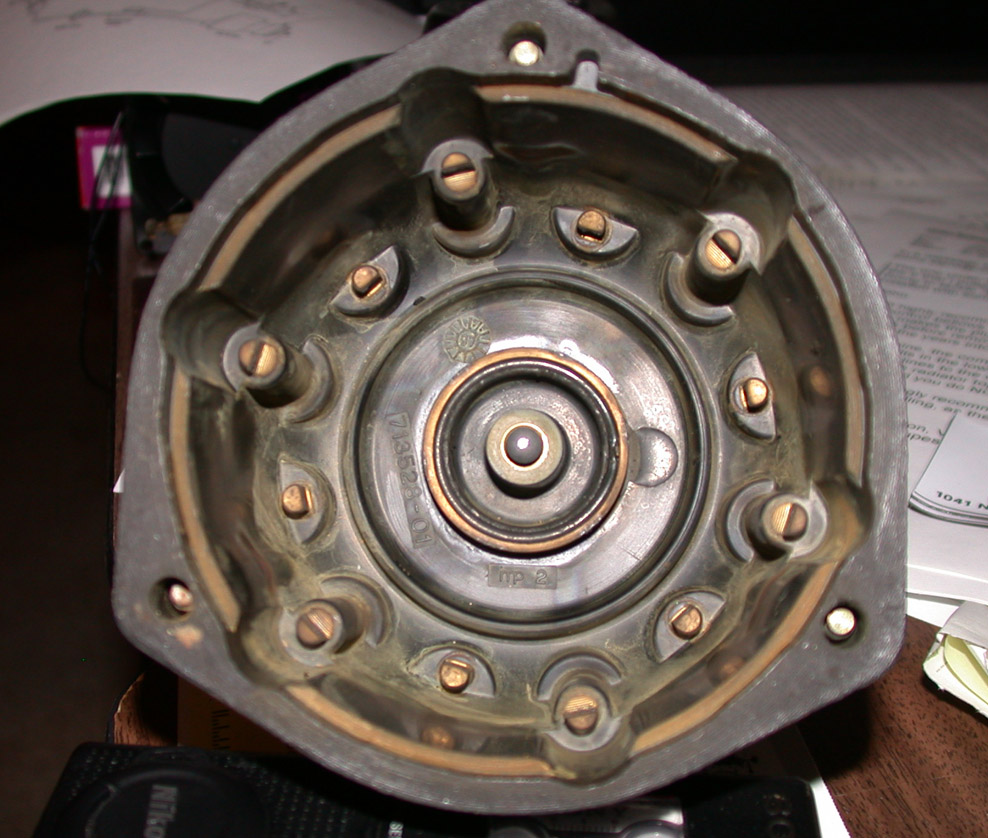
A better idea might be to insist on a genuine Marelli cap. On
the genuine Marelli cap, the center terminal includes a metal
sleeve surrounding the entire depth of the carbon brush hole. So,
the
spring
is positively in electrical contact with the sides of the hole even if
it doesn't
make it to the bottom. Here's a pic provided by Schmincke of a well-worn cap:
Note that all the metal parts are brass rather than aluminum.
Also note the difference in the way the terminals are made: round posts
machined to an ID rather than the flat sticks of the aftermarket
cap. That really shouldn't make any difference, but it's
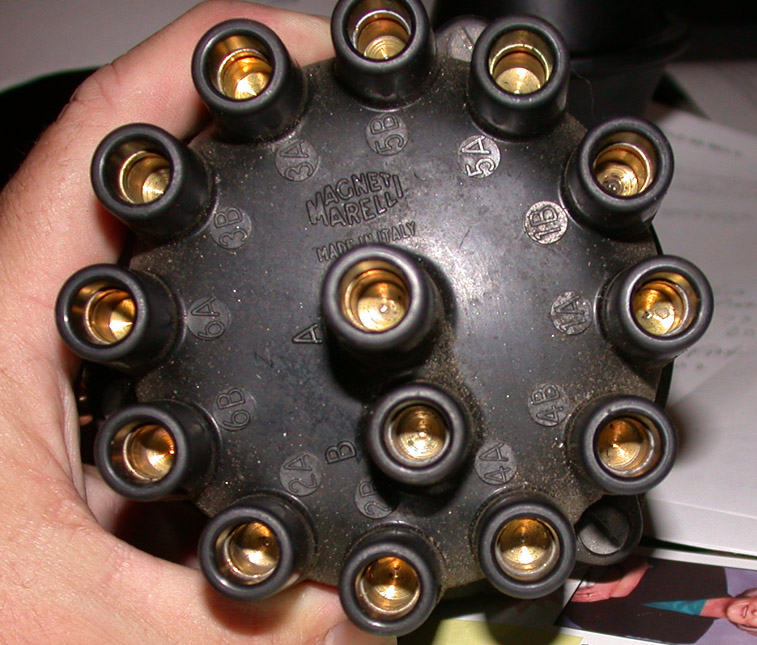
certainly nicer. Here's a pic of the top side of the genuine Marelli cap:
Note the Magneti Marelli logo. Again, that's the way to be
sure -- although once you've seen one of each, you should never have
any trouble telling a genuine Marelli cap from an aftermarket. The aftermarket manufacturer has reportedly addressed
the problem and redesigned his cap; in the newer design the terminals
are still aluminum, but the aluminum
center terminal is extended as a sleeve the entire depth of the carbon
brush hole. The aluminum is clearly visible around the
brush. This should be an acceptable fix -- but after painful
experience with aftermarket caps, a great many owners will be insisting upon genuine Marelli
parts just the same. Regardless how cheap you are or how much trouble you're having
finding acceptable parts, it would not be considered wise to install a
cap without a metal
sleeve around the carbon brush. If you happen to have such a cap,
you can add a sleeve. Buy a piece of 1/4" ID brass tubing from
a hobby shop. The standard hobby shop brass tubing is 1/32"
wall, so the OD of this tubing will be 5/16". Drill out the
opening in the cap with a 5/16" drill bit all the way down to the metal
terminal at the bottom of the hole. Install a piece of the tubing
into the hole, making very
sure that it makes solid contact with the metal terminal at the bottom
of the hole. In fact, you might want to cut the end of the tubing
to form a flexible contact that will make secure electrical contact
with the terminal, or maybe solder a bit of wire or spring to the end
to ensure electrical contact. If your tubing ends up fitting
tightly in the hole, great; if not, apply a bit of JB Weld to the
outside of the tubing to hold it securely in place. Check for
continuity between the tubing and the terminal with a VOM. When
done, cut off the brass tubing flush with the surface of the
plastic. It should end up looking like this:
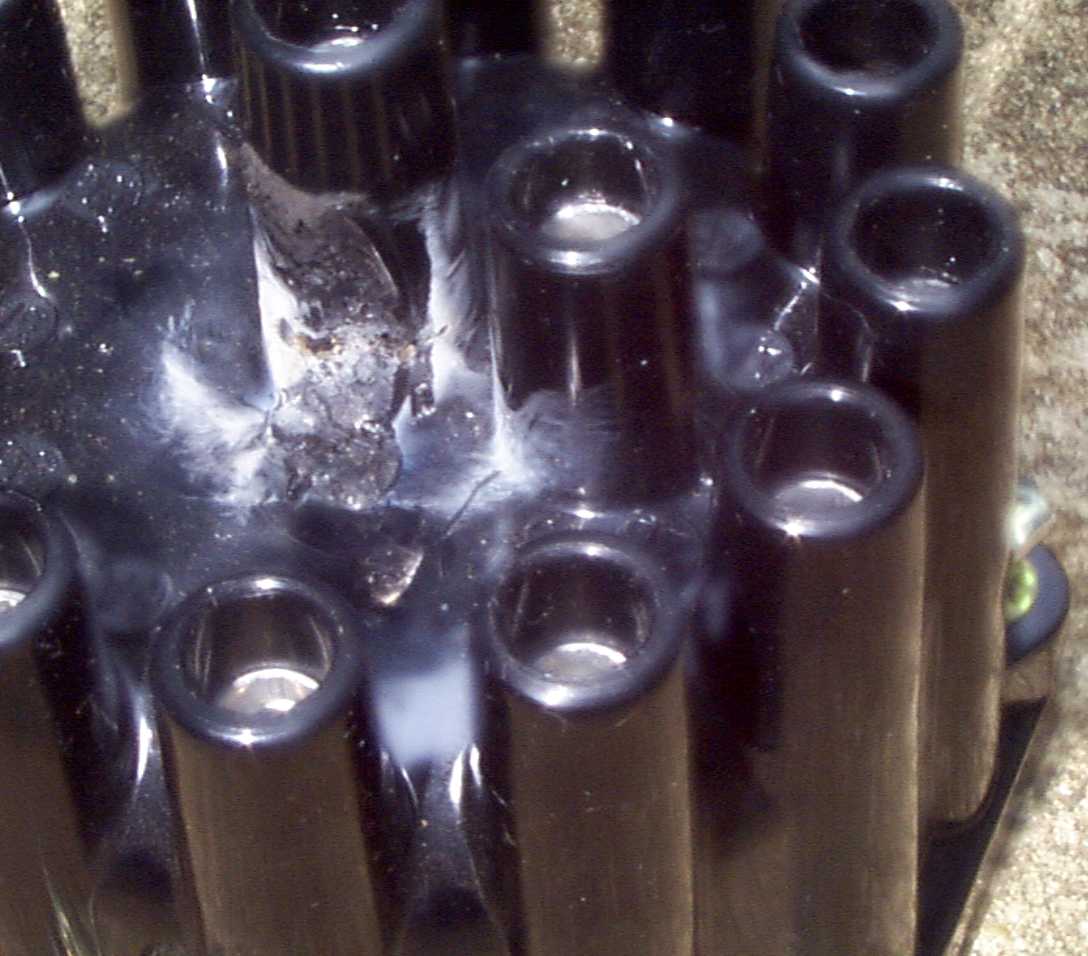
Reinstall the spring and carbon brush, and you should be good to go. Goodridge had an odd failure with his aftermarket cap, too. Rather than melting, his cap cracked around nearly half of the spark plug wire terminals, and several of them popped right off as he was trying to remove the plug wires. 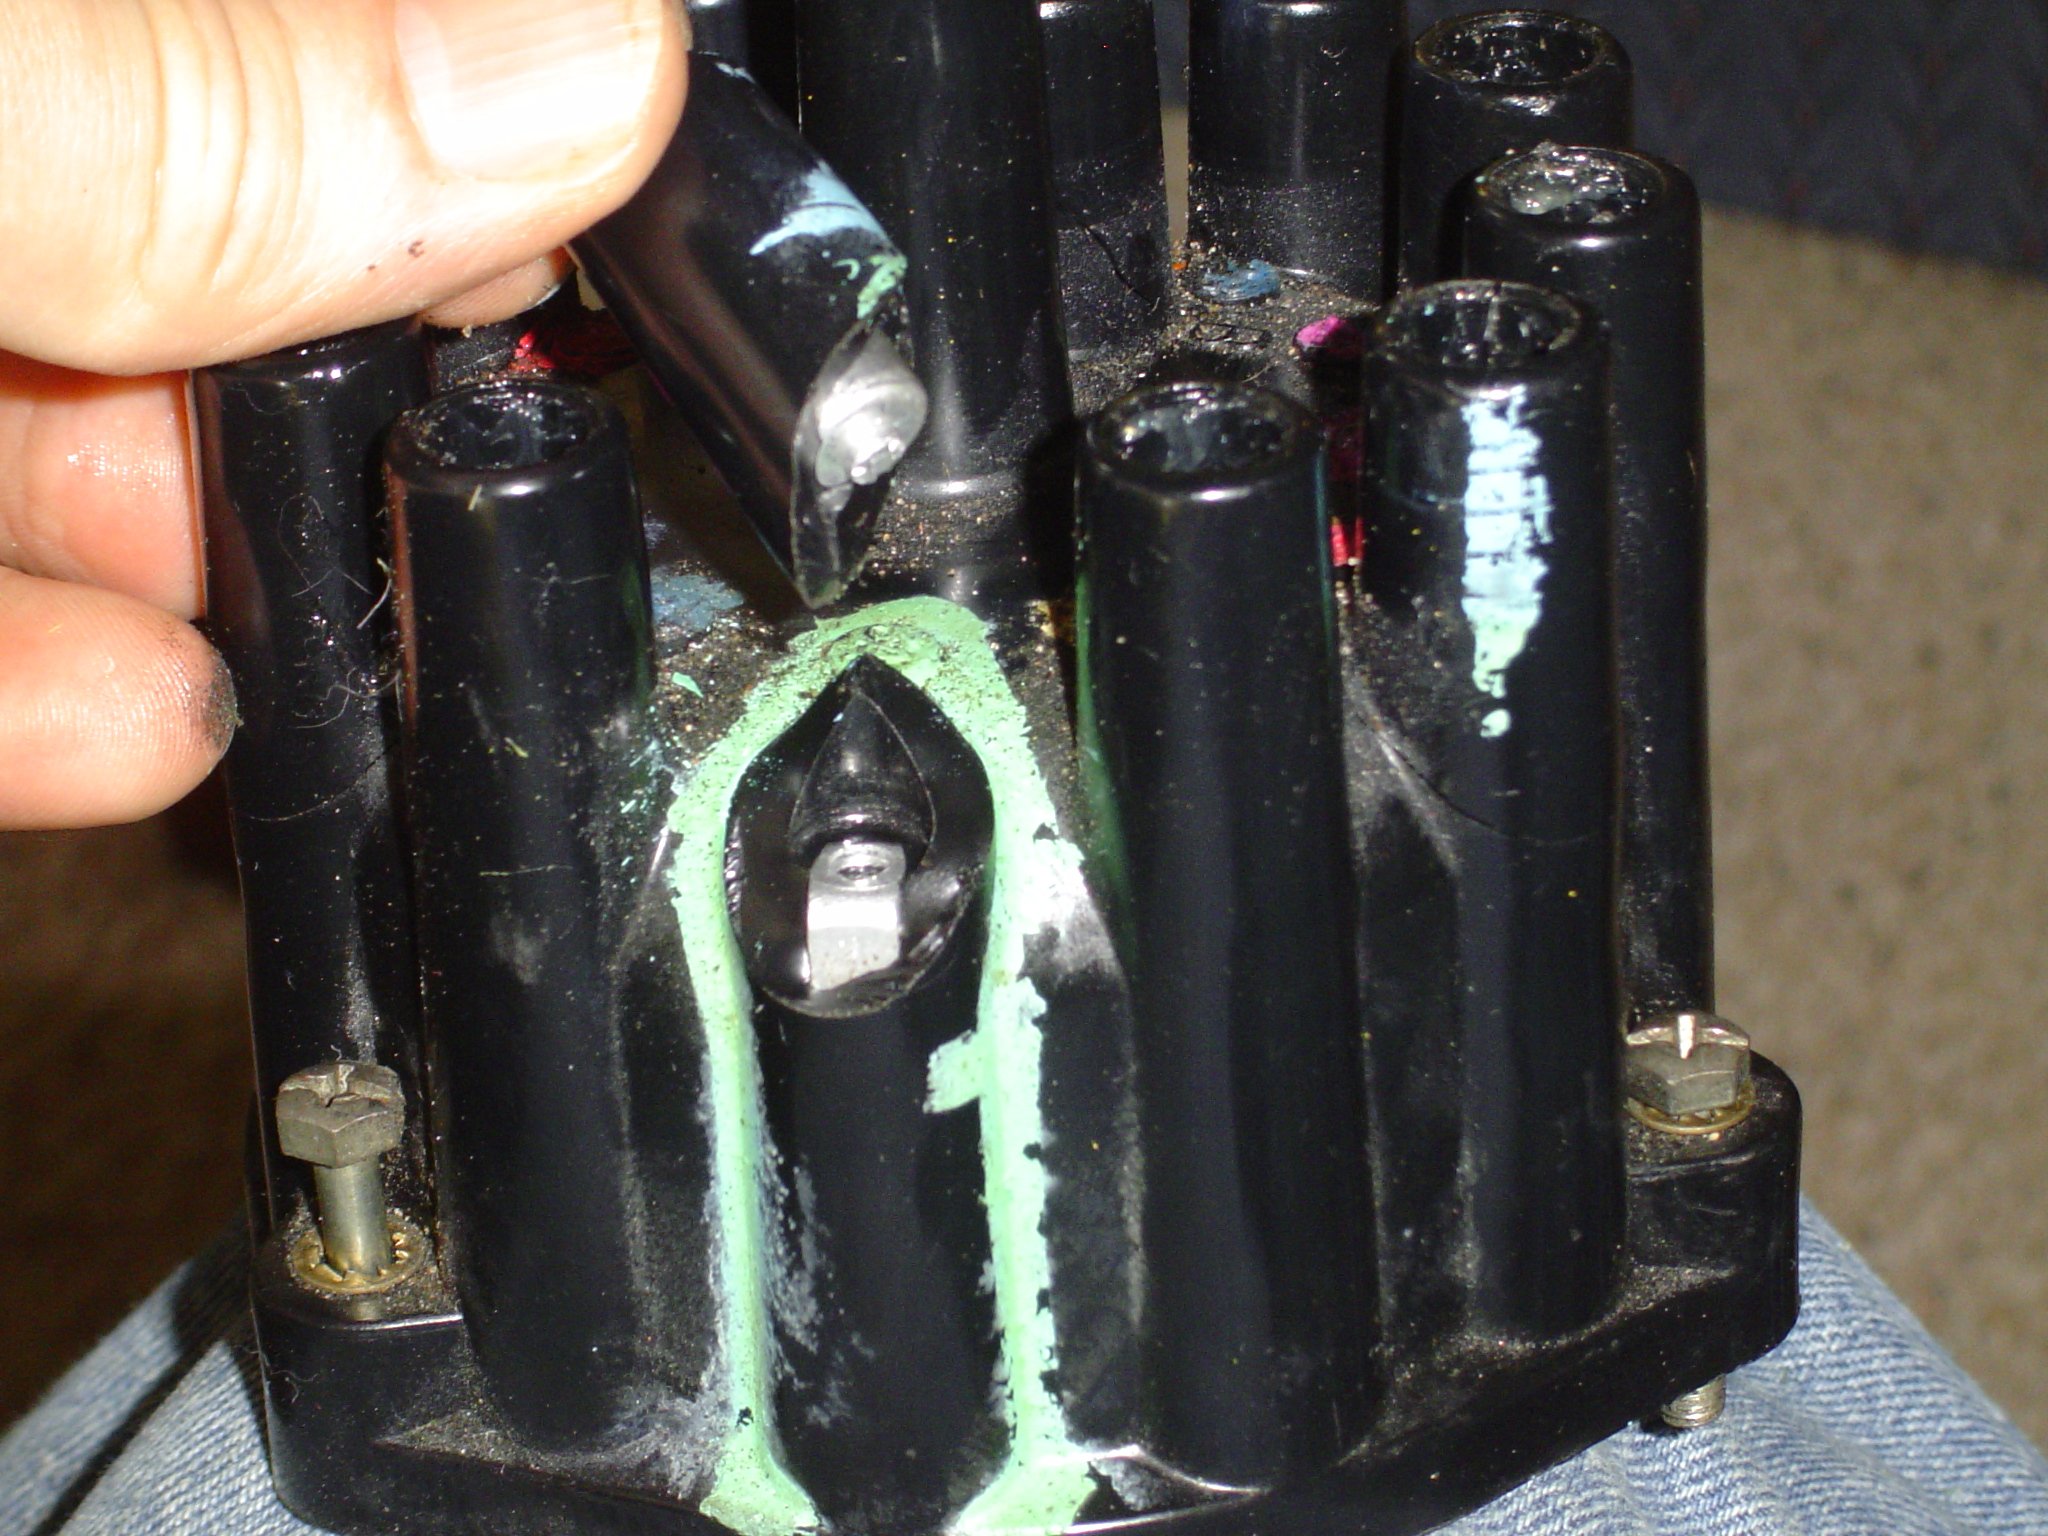 Here's another odd result: Schmincke's genuine Marelli cap has this football-shaped mark adjacent to the 1A terminal:
Michael Hewitt says, "The 'football' shaped mark is where the spark
(or part of the spark) is grounding via the cap hold-down screw,
through the cap itself." He's right, it does line up with the
screw. If this proves to be a common problem, I can think of
three things to do about it: 1) Check the gaps on the spark plugs. If the gaps are too large, they will pressure the spark to take other routes to ground such as this one. Schmincke reportedly found some really excessive gaps when he checked his plugs. 2) You could easily build up a little thickness over that area
with some JB Weld. You might use the JB Weld to attach a piece of
plastic over the area. 3) You could find some nylon screws to hold the distributor cap down with. It's also possible that this distributor isn't located quite correctly, causing the spark to fire when the rotor is pointed a bit to the right of the 1A terminal. Looking at the tips of Schmincke's rotor in the pic at the top of this page, though, it doesn't appear that's his problem.
|
|
| ||
 |
Improve your Jag-lovers experience with the Mozilla FireFox Browser!
©Jag-loversTM Ltd / JagWEBTM 1993 - 2024 All rights reserved. Jag-lovers is supported by JagWEBTM For Terms of Use and General Rules see our Disclaimer Use of the Jag-lovers logo or trademark name on sites other than Jag-lovers itself in a manner implying endorsement of commercial activities whatsoever is prohibited. Sections of this Web Site may publish members and visitors comments, opinion and photographs/images - Jag-lovers Ltd does not assume or have any responsibility or any liability for members comments or opinions, nor does it claim ownership or copyright of any material that belongs to the original poster including images. The word 'Jaguar' and the leaping cat device, whether used separately or in combination, are registered trademarks and are the property of Jaguar Cars, England. Some images may also be © Jaguar Cars. Mirroring or downloading of this site or the publication of material or any extracts therefrom in original or altered form from these pages onto other sites (including reproduction by any other Jaguar enthusiast sites) without express permission violates Jag-lovers Ltd copyright and is prohibited |
|