
Upper Wishbone Bushing And Ball Joint
Replacement
Henry Fok, photos by Larry Karpman
This task is really quite simple. You do not need to remove the front
springs, shocks, or anything else. You can easily do this in your
driveway in under an hour per side. Since the work needed to do one
or the other of these tasks is only slightly different, both tasks
are presented here, and it is recommended that you do both at the
same time, so as to get them out of the way.
The car in these pictures is my 1985 XJ6 VdP, named Molly - and of
course, the ugly galoot in the pictures is yours truly. This
information applies to the Series III only - other Series are
similar, but I can't guarantee that they'll be identical.
For this task, you will need a ratchet, a selection of metric and
standard sockets (some S3's have mixed hardware here), a short (3")
extension bar for the ratchet, wrenches to correspond with the
sockets and the replacement parts. If replacing the ball joint, you
will also need a ball joint removal tool. I have good luck with the
smaller AutoZone tool intended to remove Pittman arm ends and tie rod
ends. You will also want to replace any nylon-tipped lock nuts, or
alternately use Loctite to recycle the ones already there.
You may click on any picture to see a much larger version. This
FAQ is not a substitute for a workshop manual. It is intended as a
supplement, to give you some idea of what things look like and what
the manual is talking about. Therefore, not all the details will be
given.
***
Loosen the lug nuts on the appropriate wheel. Jack the car up and
support it properly. Instructions on how to do this are elsewhere in
the FAQ's, so I will not reprise that information here.
Remove the wheel. What you see should look something like the
following picture. The picture shows a car that is improperly
supported. Do not attempt to service your car while it is supported
by a jack. This was done for photo purposes only, please do not
endanger yourself by doing this.

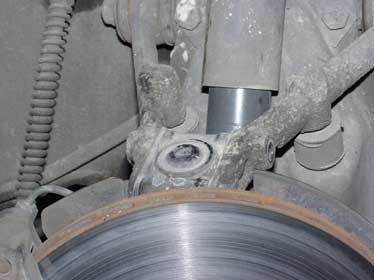
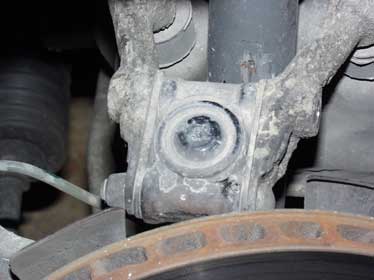
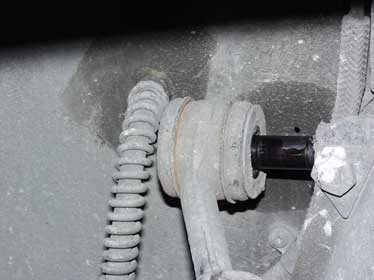
You see the upper wishbone clearly presented. The ball joint is at
the point of the inverted "A" formed by the two arms of the wishbone.
This ball joint is of the sealed XJ40 type; the originals have a
grease fitting here.

First, set a jack underneath the lower wishbone, perhaps on the
lower ball joint housing, cushioned by a piece of wood. Jack the
wheel assembly up a bit, taking some of the pressure off the upper
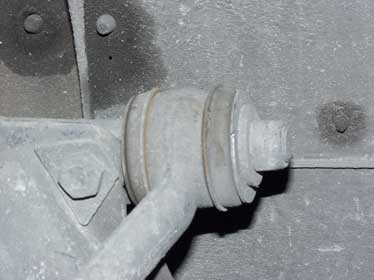
wishbone. Remove the rear ball joint through bolt.
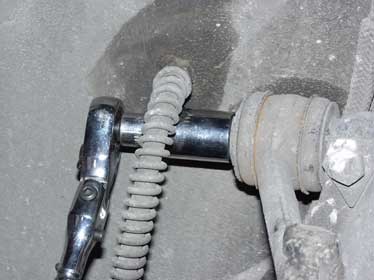
In the above pictures, the steering wheel has been turned so that
one can get access to the nut on the front through bolt. Note how
these come out. They must go in the same way. Remove the front
through bolt. Be careful not to let the loose wheel assembly flop
outwards and damage the brake hose. I suggest placing a jack stand
against the wheel hub to act as a stand and hold it in place.
At this point each of the wishbone arms is free to rotate
separately. If you are replacing the upper ball joint, undo the
locknut on the underside and use your removal tool to pop it out. It
is not necessary to remove the ball joint to replace the
bushings.
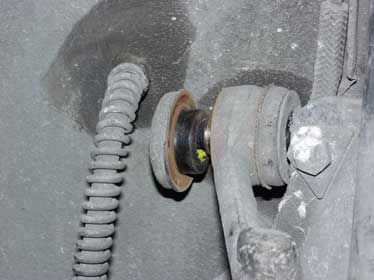
Now that the wishbones are free, you can remove the lock nuts that
hold them, and the bushings, in place. First, remove the front nut
and slide the wishbone arm and bushing off.

It should be obvious how the bushings just pop right out of the
wishbone arm. However, removing the rear wishbone can be a little
tricky. You can't remove it as a piece - the brake hose is in the way
(see below picture). Remove the nut that secures the rear wishbone
arm assembly.
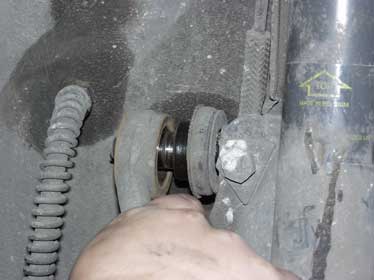
Instead, remove it a piece at a time. The rear half of the
bushing, then the arm, then the other half of the bushing.
Clean up the interior of the arms. Grease the bushings well with
chassis grease. And, as they say, installation is the reverse of
removal.
One final note - you may have to play with the jack to adjust the
height of the lower assembly in order to get the bolts back in the
ball joint. If you accidentally strip or otherwise bugger up one of
your ball joint through bolts, make sure you replace it with grade 8
(if SAE) or 10.8 (if metric) type bolts. Anything less will result in
sheared bolts and a very unhappy owner.


