Front Spring Replacement
Henry Fok, photos by Larry Karpman
This task is not hard, but it is very long and tedious. It can also
be very dangerous if you are not careful, so be forewarned. You can
easily do this in your driveway in under three hours per side.
The red car in these pictures is Larry Karpman's 1987 XJ6 VdP. The
brown car in these pictures is my 1985 XJ6 VdP, named Molly - and of
course, the ugly galoot in the pictures is yours truly. This
information applies to the Series III only - other Series are
similar, but I can't guarantee that they'll be identical.
For this task, you will need a ratchet, a selection of SAE
sockets, and a set of SAE speed wrenches or O-ratchets. You
will also need the springs and some Grade 8 1/2" fine threaded
rod in 1' lengths, or similar bolts about 1' long. Threaded rods were
used in this session, but the bolts would have worked better. If you
use the bolts, you will need two with full length thread, and two
with either full length thread or smooth bodied with at least 1"
thread at the tip. You will also need four Grade 8 1/2" fine thread
nuts.
You may click on any picture to see a much larger version. This
FAQ is not a substitute for a workshop manual. It is intended as a
supplement, to give you some idea of what things look like and what
the manual is talking about. Therefore, not all the details will be
given.
***
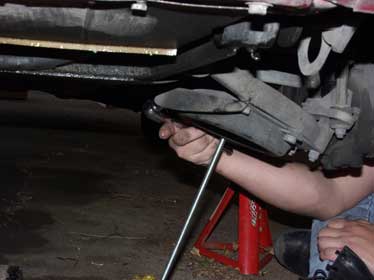
Loosen the lug nuts on the appropriate wheel. Jack the car up and
support it properly. Instructions on how to do this are elsewhere in
the FAQ's, so I will not reprise that information here.
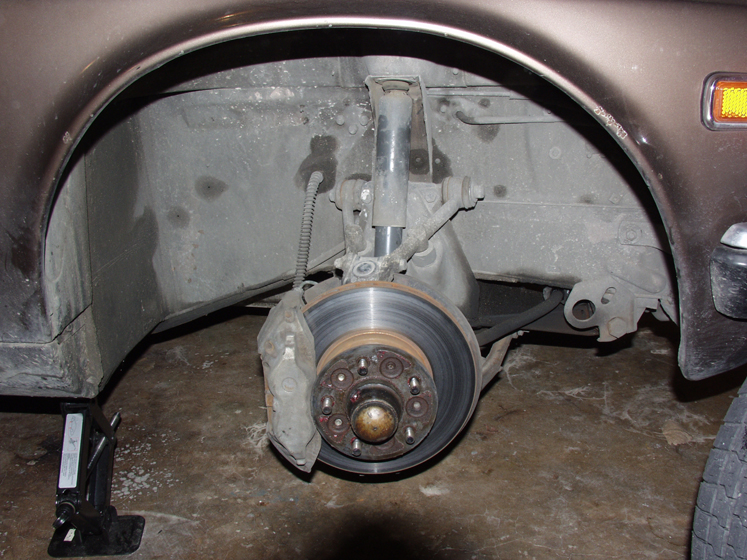
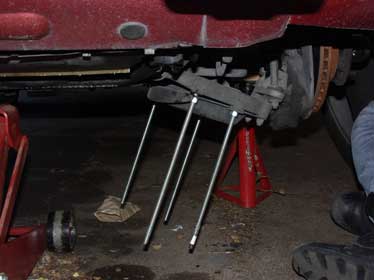
Remove the wheel. What you see should look something like the
following picture. The picture shows a car that is improperly
supported. Do not attempt to service your car while it is supported
by a jack. This was done for photo purposes only, please do not
endanger yourself by doing this.
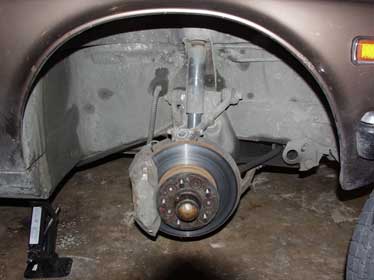
The shock, control arms, and spring assembly are clearly visible.
The spring pan (part that holds the spring in the subframe) is
attached to the lower control arm by four bolts.
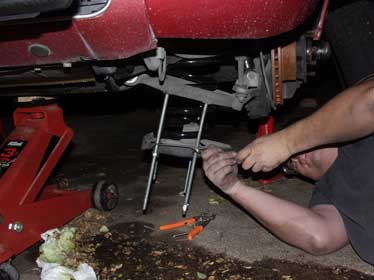
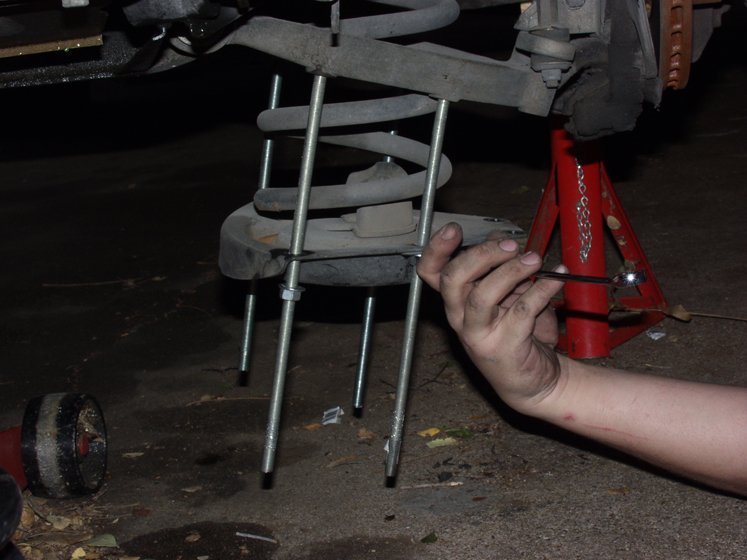
Carefully remove one of the outer pair of bolts and replace it
with a threaded rod or one of the full length thread bolts. If using
bolts, put the nut and washer on and spin it until it's halfway down
the bolt. Be careful not to strip the hole out. Once the rod or bolt
is seated all the way, spin the nut all the way up until it is in
contact with the spring pan. Repeat for the other outer bolt, then
for the inner two - except if using bolts, place the smooth bodied
ones (if you have them) on the inner holes - these will be used as
guide pins. You do not have to use nuts on the inner ones, though you
can, if that makes you feel safer.
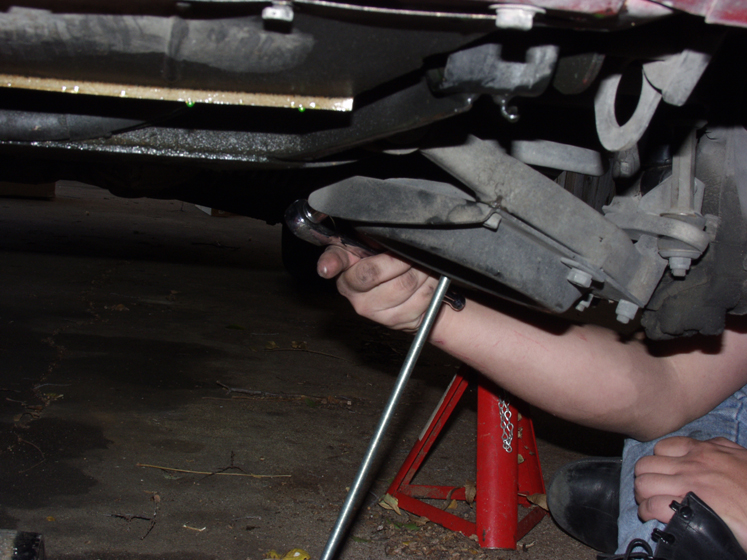
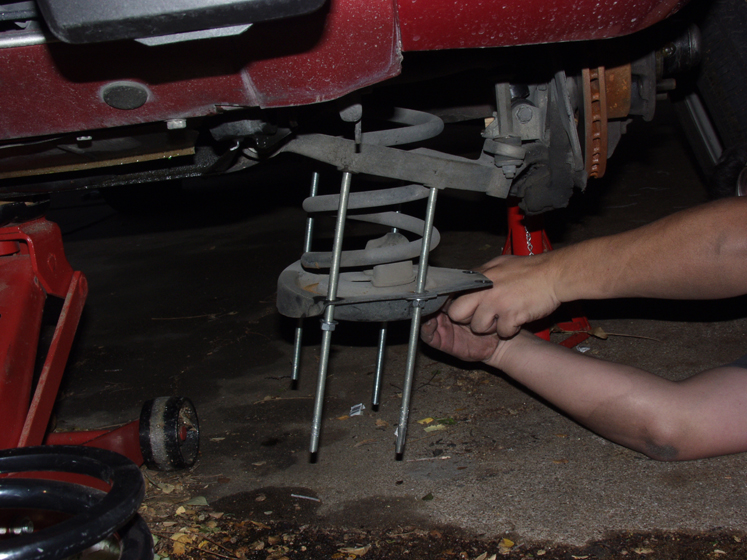
Now we remove the things. If you have nuts on the inner rods or
bolts, spin them off until they are two inches below the pan. Using
your speed wrench or o-ratchet, loosen the outer two nuts in stages,
working from side to side, so the pan descends. The pan will hang up
on the rears on occasion, if you are using threaded rod or full
thread bolts. This is normal, and nothing to be alarmed about. When
the outer pan nuts are level with the inner pan nuts, back the inners
off another few inches. This assumes that you have inner pan nuts -
again they are not necessary.

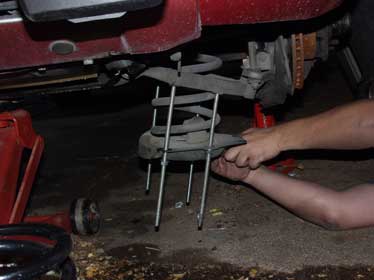
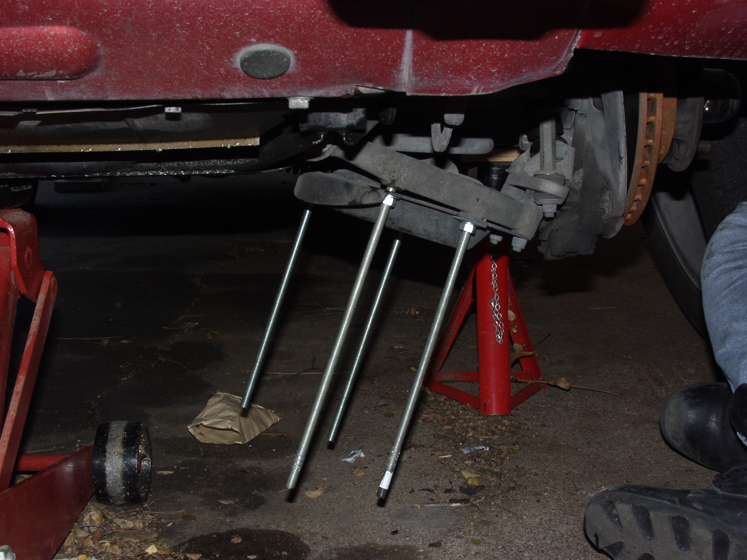
Eventually, you will lower the spring pan to the point where the
spring is no longer compressed. A little more, and you can remove the
spring without removing the pan. Pay attention to the plastic rings
which may be at the top of the spring. These are packing pieces, and
you will need to put them back in place with the new spring. Examine
the rods/bolts for stripping and distortion. If any is detected,
replace them before installing the new spring.
That's pretty much it. As I said, not hard, just time-consuming.
Installation is the reverse of disassembly, as the phrase goes.